Table of Contents
Customers Module Leads Navigating Leads Page Leads (Customers) Columns Creating a new LeadLeads General Information PageCustomers Module Leads
Selecting Leads offers a view of all “Leads” entered into FCOS by a user corresponding to a Franchisee and/or Facility.
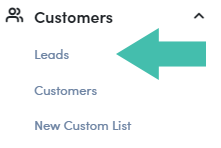
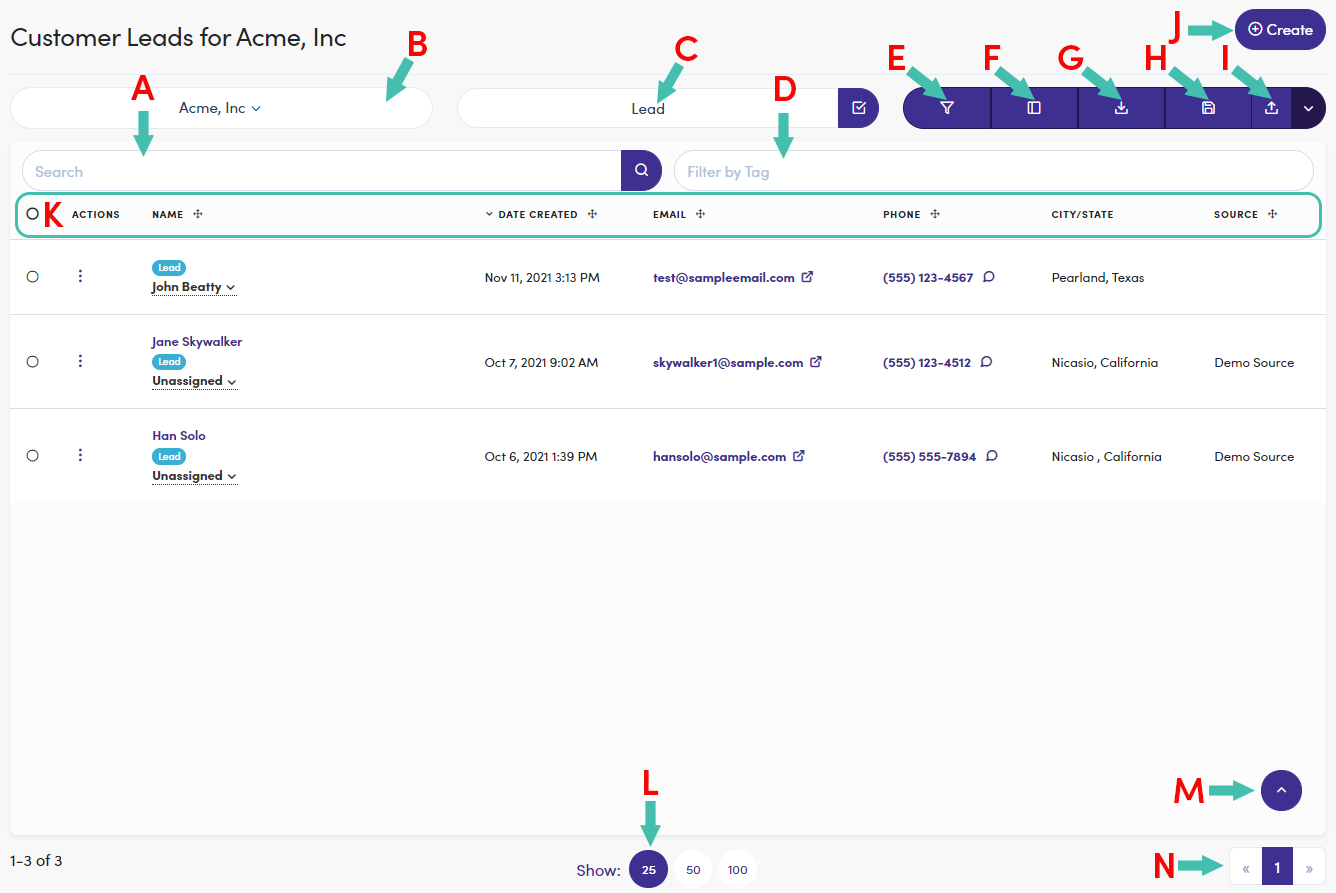
Navigating Leads Page
- Search Bar
- Franchisee/Source selection (drop-down menu)
- Status selection (filter menu)
- “#” Tag Filter Bar
- Add Filters (pop-up)
- Select Visible Columns
- Import Leads
- Create/Save/Share – View w/Applied Filters
- Export View (.csv file)
-
 - Export “All Columns” or “Selected Columns”
-
- “Create” a new Lead
- Visible Columns
- Number of Entries Shown (selectable)
- Back to Top (of page)
- Next/Previous Page Navigation
Info
Clicking on the Lead's "name" (Jane Skywalker) opens the Lead General Information page (detailed below "Lead General Information Page").
Leads (Customers) Columns
The comprehensive Leads (Customers) view includes the following default columns:
| Column | Description |
| ACTIONS | Quick action to Edit |
| NAME | Lead name and drop-down menu to assign lead to person (name and email) |
| DATE CREATED | Represents the date the Lead is entered into FCOS |
| The email of the “Lead” | |
| PHONE | Lead’s phone number and quick action “send text” |
| CITY/STATE | Corresponds to “City/State” of Lead’s entry page |
| SOURCE | Corresponds to “Source” of Lead’s entry page |
Creating a new Lead
The leads that appear within the “Customer Leads” list are entered directly from the “Leads” page by clicking  , in the top right-hand corner of the screen. A form appears with the following required (*) fields (with additional optional fields see image below):
- Type
- Franchisor
- Alliance
- Franchisee
- Customer
- Owned By
- This will be the Facility
- First Name
- Last Name
- Email or Phone (one must be entered)
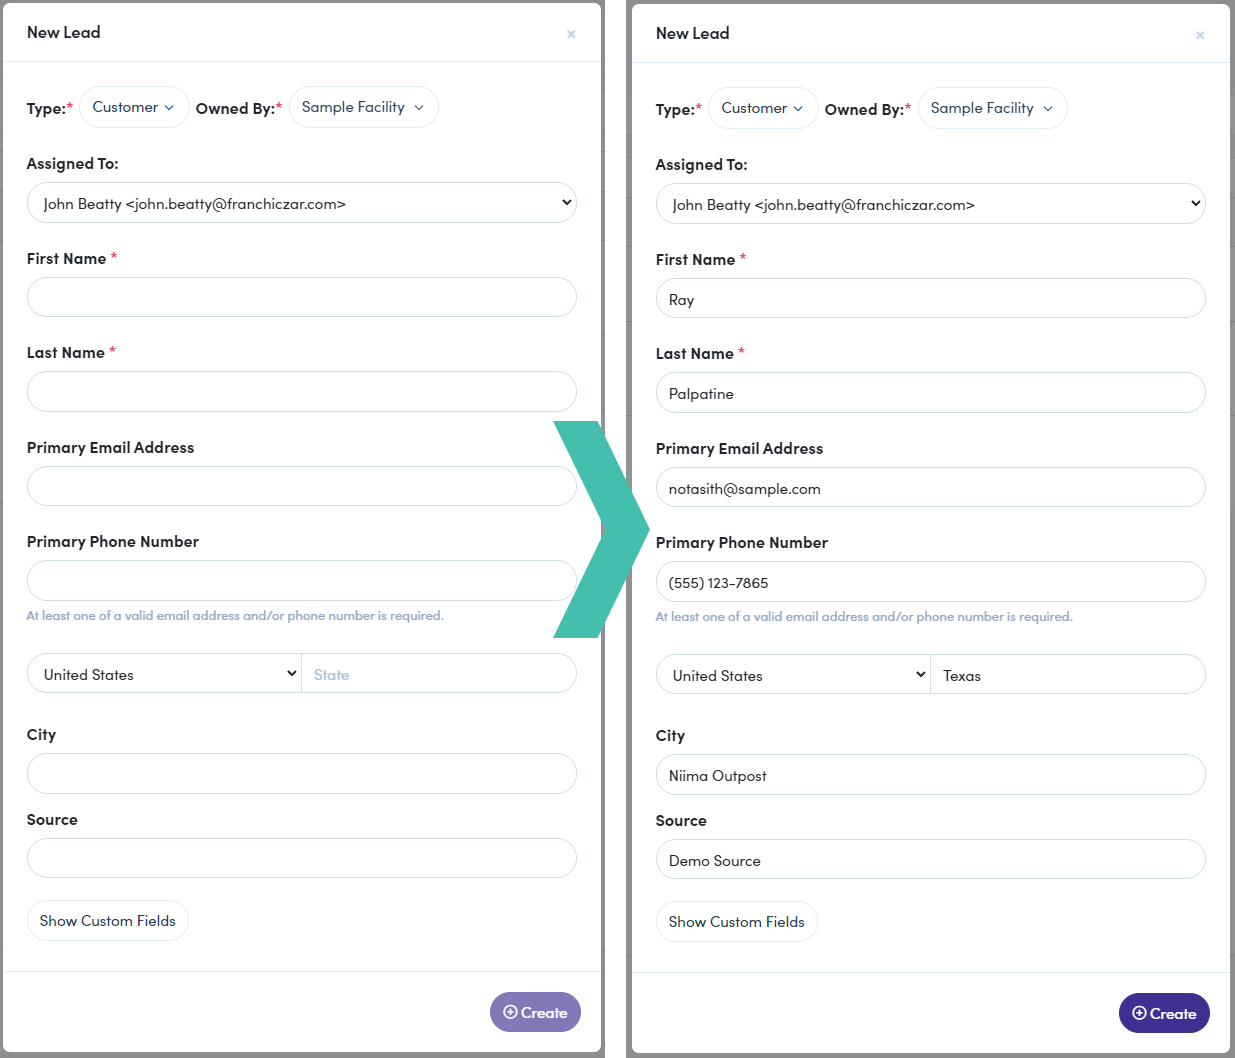
Once you complete the form click  , at the bottom of the window.
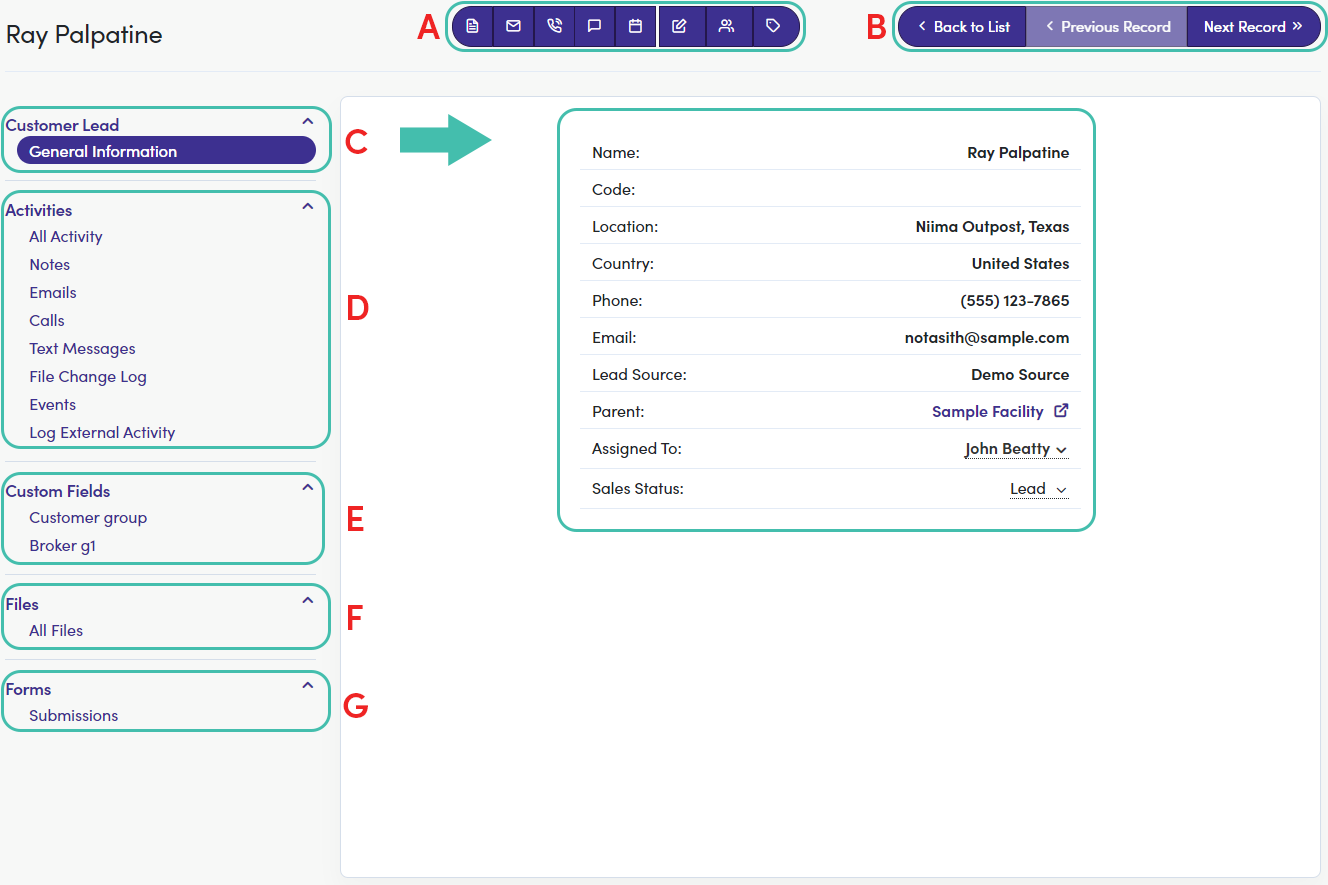
Lead's General Information Page
Once a “Lead” is created, you can manage a lead by clicking on it from the Leads list. Here is a breakdown of the Lead management page:
- Quick Action Menu (from left to right)
- Create a Note
- Send an Email
- Make a Call
- Send a Text Message
- Events (Opens Calendar)
- Edit General Information
- Merge with Another Record
- Add Tag
- Record Navigation
- “Customer Lead” Menu
- General Information – Lead’s information card (editable)
- “Activities” Menu
- All Activity – Logs all action take with lead and who performed each action
- Notes – Logs all notes made on lead and who added
- Emails – Logs all email communications (including all content)
- Calls – Logs all calls made corresponding to entry
- Text Messages – Logs all text messages made to corresponding entry
- File Change Log – Logs all changes made to lead "Files" (below)
- Event - Calendar of scheduled events
- Log External Activity – Platform to enter all external communication with lead
- call
- text
- event
- Custom Fields (these are created via Settings>Custom Fields)
- Files
- All Files – Repository of files corresponding to lead
- Forms
- Submissions – Record of forms submitted to lead