
Parallel Timelines
Depending on your needs Timelines offers two options that affect how you prefer on handling the tasks added to a Milestone, Parallel and Sequential.
In this article, we are covering how to create a Parallel Timeline. Tasks added to a Parallel timeline can be activated/completed in any order, with the exception of “Automation” tasks. Any “Automation” is triggered by the completion of the task directly above.
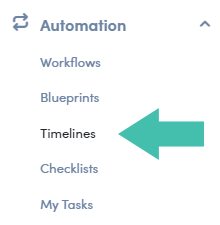
To get started expand the "Automations" menu and click on Timelines.
Building a Parallel Timeline
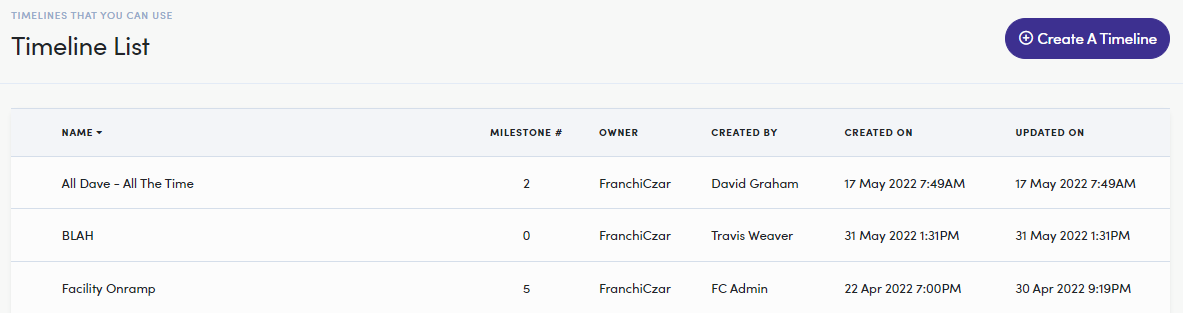
The landing page is the same for both types of Timelines. Here is where all your Timelines are listed and where you come to edit or update your Timelines.
For this process click on the  button to start building a new Timeline.
Further Your Knowledge
Check out our other materials on Timelines to learn more about editing, updating, and building other types of Timelines. Search for “timelines” or visit the Automations section.
Step 1: Initial Configuration of Timeline
Now, we are on the initial configuration page. This is where we need to Name the timeline, provide a brief Description, choose which Company or Node (i.e. Franchisee, Facility, Customer, etc.), and toggle on/off if you would like this timeline to be sharable.
The table below has more detailed descriptions for the “Timeline can be assigned to this type of company” dropdown:
| Dropdown Option | Description |
|---|---|
| Broker | Selecting this option, allows the Timeline to be utilized by and for the Broker level. |
| Franchisor | Timeline is built for and applied to a Franchisor. |
| Franchisee | Timeline is built for and applied to a Franchisee. |
| Facility | Timeline is built for and applied to a Facility. |
| Customer | Timeline is built for and applied to a Customer. |
| Member | Timeline is built for and applied to a Member. |
Here are our settings for this example. Click Create Timeline, when you are ready to continue.
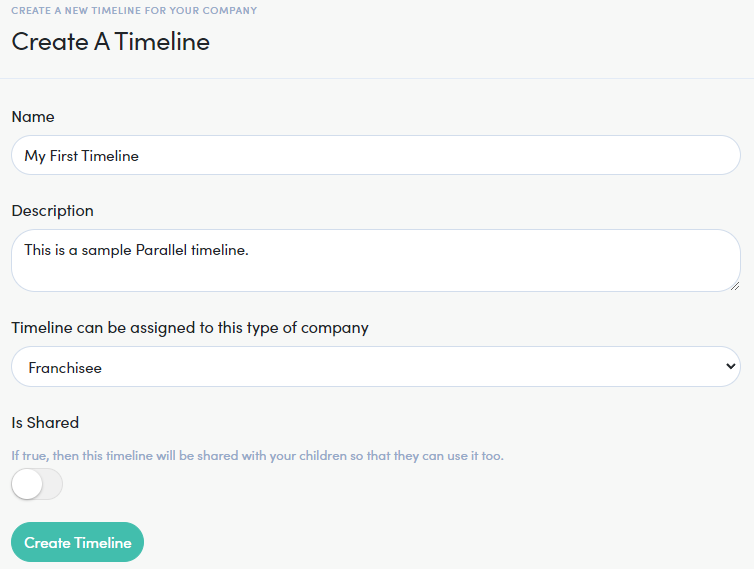
Using the “Is Shared” Toggle
The Is Shared toggle allows this timeline to be shared with the ‘children’ (i.e. Facilities for Franchisee) of the assigned company type.
Step 2: Adding a Milestone
Once we create a new timeline we have a blank slate to begin building out "Milestones". Click the green plus button to start adding milestones.
What's a Milestone?
Milestones are the building blocks of a timeline that contain a "Checklist" and any number of associated "Tasks"
We now have the “Add A Milestone” modal, where we add a Name, Description, and the option to either Create [a] New or an Existing checklist structure (see descriptions below). But, we are going through this process as your first timeline so select Create New and Save.
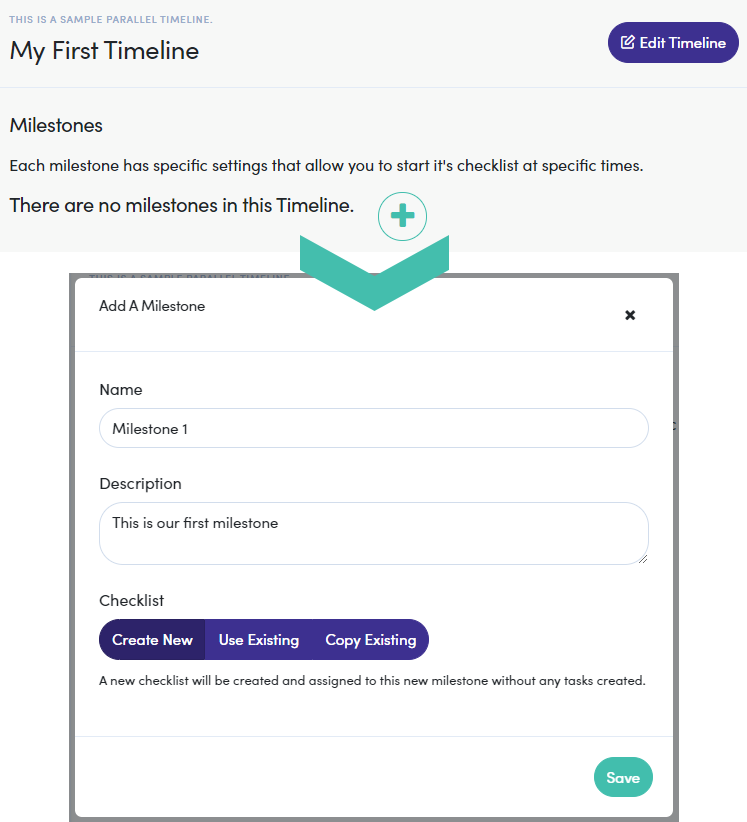
| Checklist Option | Description |
|---|---|
| Create New | A blank checklist added to the new milestone |
| Use Existing | The checklist selected is added to the new milestone and synced to reflect changes made |
| Copy Existing | The checklist selected is copied to the new milestone |
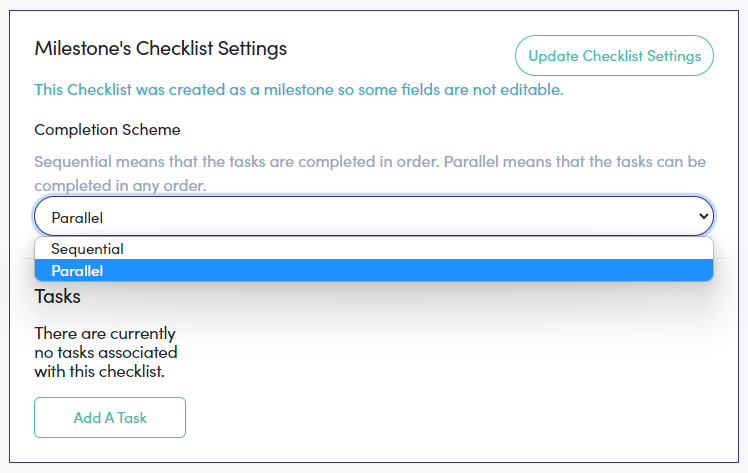
Step 3: Milestone's Checklist Settings
Now that we have a milestone added to our timeline, it is time to configure our “checklist”. Use the dropdown, under “Completion Scheme”, to select Parallel.
Changing the ‘Completion Scheme’
At any time, you can revisit a Timeline and change the "Completion Scheme" to or from Parallel or Sequential. Please be aware, that this WILL NOT affect currently active Timelines.
Step 4: Adding a Task
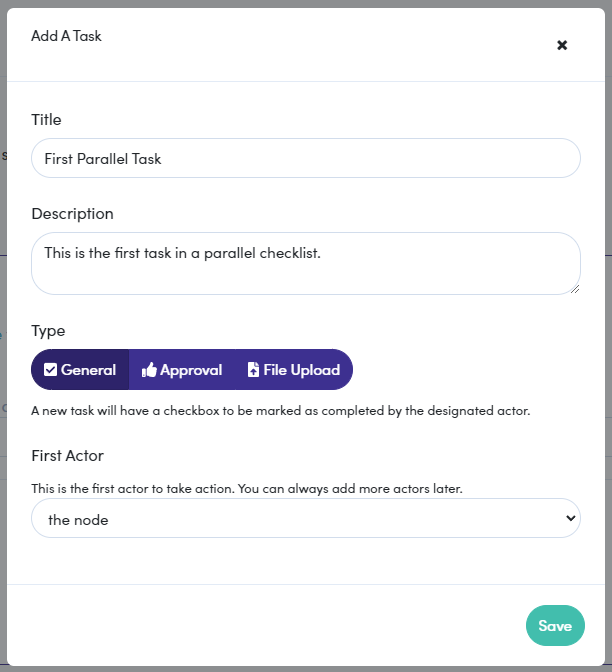
After the “Completion Scheme” is chosen, we are ready to begin adding “Tasks”. Click the Add a Task button to launch the task configuration modal.
Just as we have done for the Timeline and Milestone, we need to provide a Title and Description for the task. For Type, there are three options “General”, “Approval”, and “File Upload” (see descriptions below).
| Type Option | Description |
|---|---|
| General | This type of task is simply marked as Complete by a designated person/actor |
| Approval | This task type requires someone/actor to approve something |
| File Upload | This task type is used when a person/actor must upload a file to satisfy the task's completion |
The last section here wants to know “who” is completing this task (see descriptions below).
| Actor Option | Description |
|---|---|
| the node | This option will assign the actor as the same node selected in “step 1” (i.e. Broker, Franchisor, Franchisee, etc.) |
| the node's parent | Selecting this assigns the actor to the level direct above “the node” (reference table in step 1) |
| the node's assigned user | If someone is assigned to a node they are designated the actor |
| a specific user | Expands another dropdown to select a specific user as the actor |
| a specific node | Expands another dropdown able to search and select a specific node (e.g. a franchisee or facility) |
| the automation engine | FCOS system is the actor (this also limits the type to "General" and workflow configurations are done within the task) |
Adding Multiple Actors
After a task is created, you can add more “Actors” (if needed). This is covered further down in this article.
For this, we are choosing the node. Check back over your configurations and click Save when you are ready to continue.
Step 5: Configuring a Task
Now, we can configure the details for how this task runs, once activated, and if we want to add any automated functions.
Let's go through each tab, and elements they each contain, and what they are for.
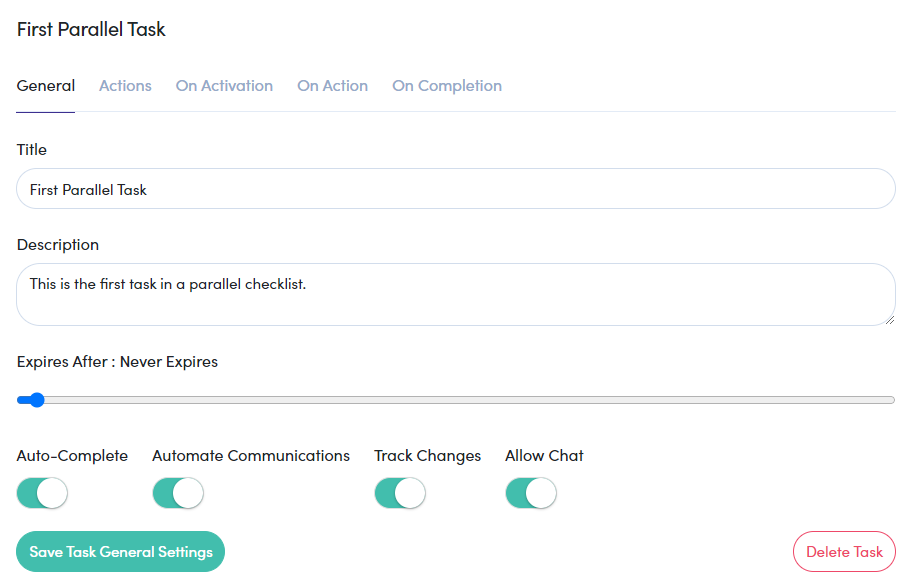
'General' Tab
This is the first thing you see after adding a task. From here you can edit the tasks “Title” and “Description". The new configurations include:
- Expires After - Use the slide bar to set a window of time for the completion of this task
- Auto-Complete (toggle) - Allow task to complete if the assigned actor completes what has been assigned
- Automate Communications (toggle) - Sends FCOS communications or email depending on task type
- Track Changes (toggle) - Allows FCOS to keep a log of all actions made on this task
- Allow Chat (toggle) - Allows admins and actors to chat regarding this task
'Chat' Under Construction
The “Allow Chat” feature is under construction but will be available soon.
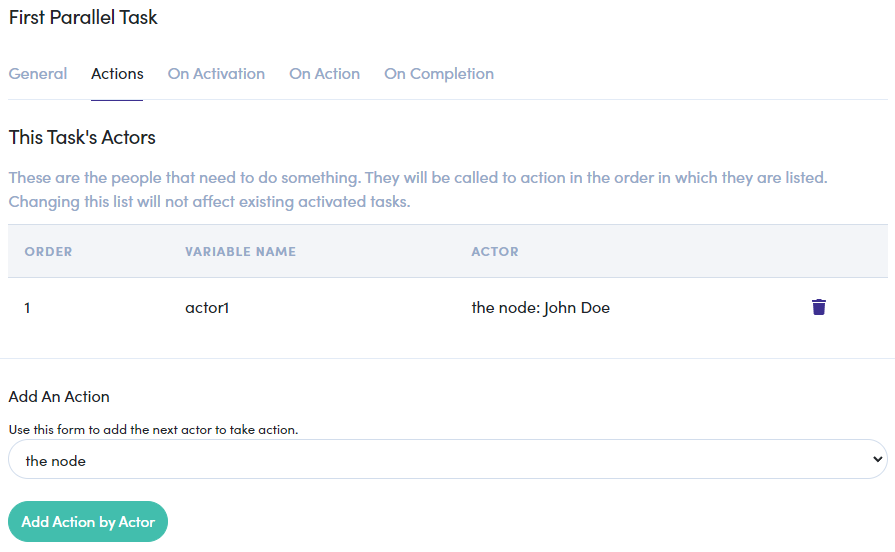
'Actions' Tab
Clicking on this tab, we see the actor assigned according to the selection in "step 4". We also have the ability to add more actors using the same selection criteria as “step 4” after clicking the Add Action by Actor button.
Order of “Actors”
If multiple Actors are added to a task, they are called on for actions in the order listed. Learn more about Managing Actors on Your Timeline & Checklist.
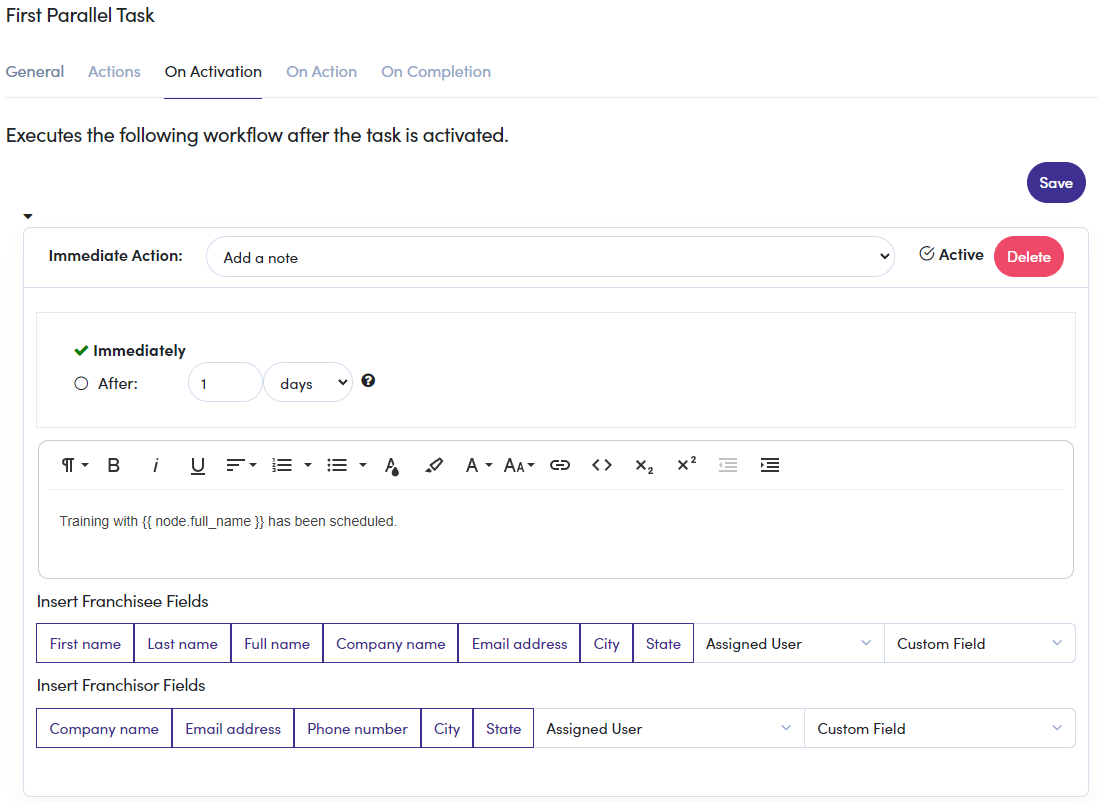
'On Activation' Tab
The On Activation tab allows you to add an automated workflow to be initiated once this task is “Activated”. This can be anything from “adding a note” to a profile, to "sending an email", or "updating a field". Make sure to click Save (on the top right) if you add an Action here.
Sample ‘On Activation’ Action
We set up the “On Activation” below to add a note to the profile where this timeline is activated.
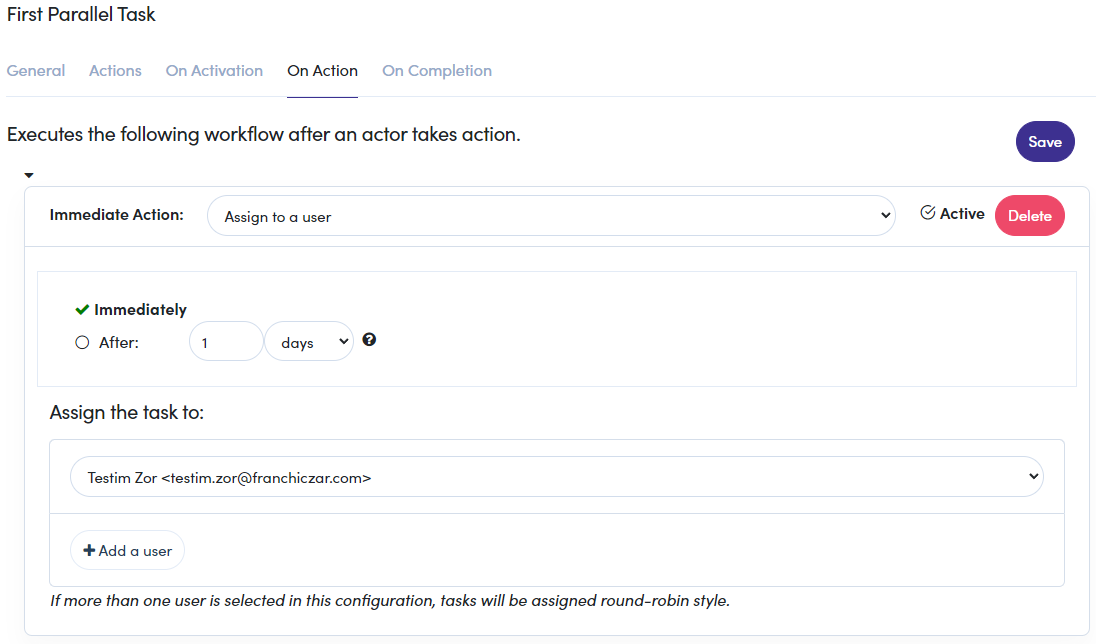
'On Action' Tab
The On Action tab allows you to add an automated workflow to be initiated once the “Actor" takes action on this task. This can be anything from “adding a note” to a profile, to "sending an email", or "updating a field". Make sure to click Save (on the top right) if you add an Action here.
Sample ‘On Action’ Action
We set up an Assign to a user workflow, to take trigger once the Actor assigned to this task takes their action.
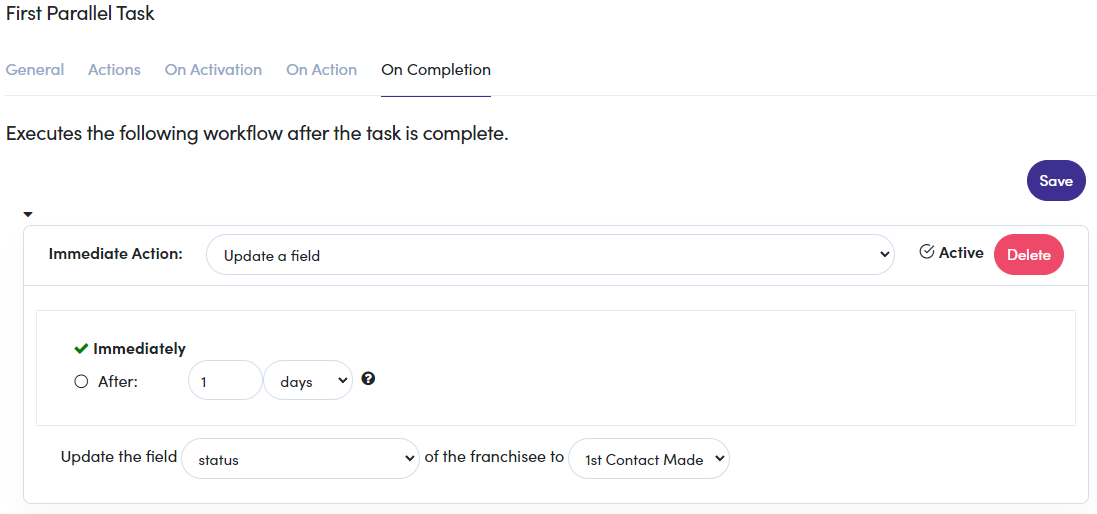
'On Completion' Tab
The On Completion tab allows you to add an automated workflow to be initiated once the “Task" is marked at "Complete". This can be anything from “adding a note” to a profile, to "sending an email", or "updating a field". Make sure to click Save (on the top right) if you add an Action here.
Sample ‘On Completion’ Action
We configured an “Action” to Update a field of the Company/node that we assigned in “Step 1”.
CONGRATULATIONS!
You now know how to create a Timeline, add a Milestone, and add/configure tasks in a checklist.
Learn More About Timelines
Continue your knowledge with Timelines, by searching for “timelines” from the help.FCOS homepage or look in the “Automations” section.