Introduction
In this section we will learn how to complete and submit a Check-In that was submitted to you by the Franchisor or FranchiCzar for completion.
Components
To begin completing your new Check-in select the ‘Submit’ button found at the far left side of your most current check-in in the My Check-Ins list in your dashboard.

The top portion of the check-in form is to get a pulse on where you are mentally in your business and personal life (if it is affecting your business).
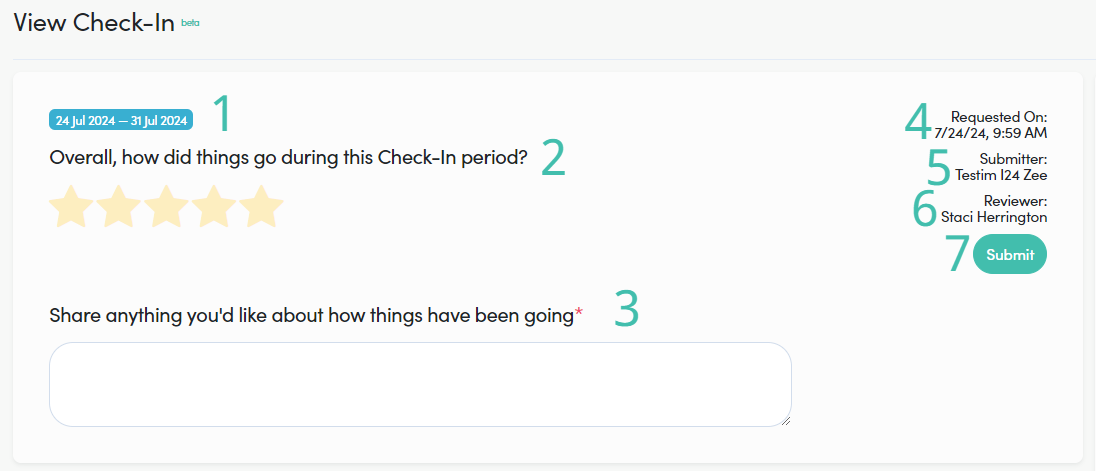
You can view multiple items in this top card of the check-in.
- Period: This is the date time span for which this check-in is requesting information on.
- Ratings: This is a ratings bar to show you feel things went for you during this time period.
- Share Info: Use this to alert the team to anything that may be going on in your life (good or bad) that may be affecting your business.
- Requested On: Date check-in was sent to you by the franchisor
- Submitter: The user who was sent the check-in for completion.
- Reviewer: The person who will be handling the review once it has been submitted by the user.
- Submit: This button will submit the form once it has been completed by the user.
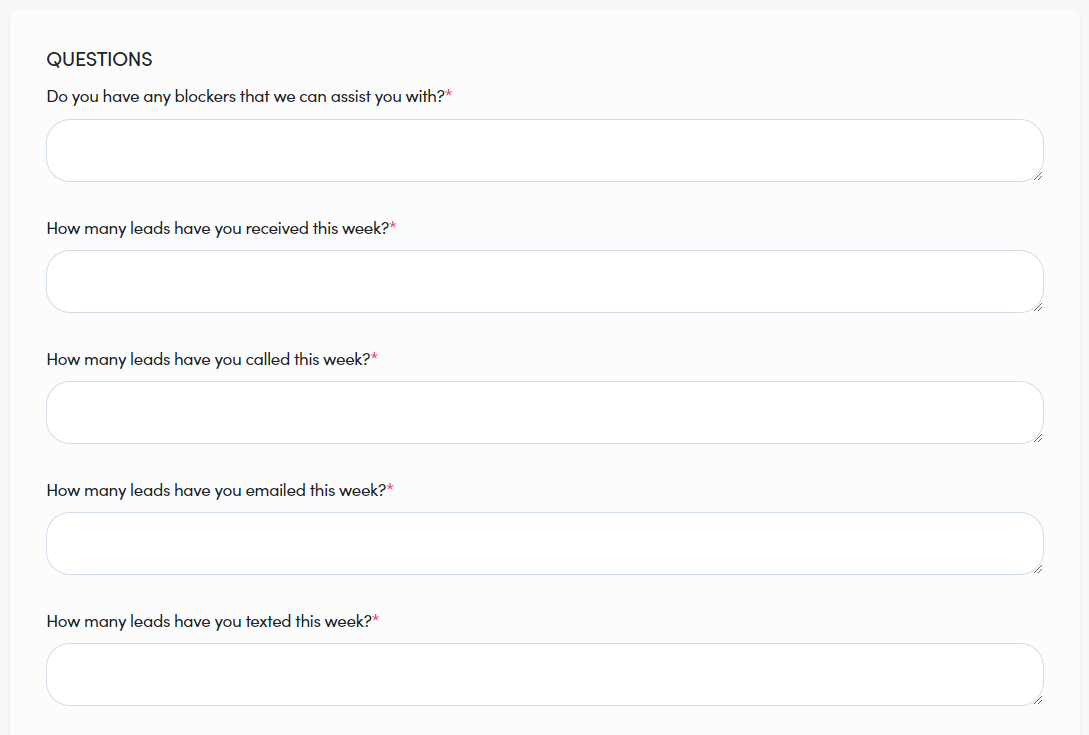
For the second portion of the check-in we have questions. While your questions may vary from below, these will be asked weekly to get a pulse on your business to see if there is anything that the Franchisor or FranchiCzar can do to assist you better with your business.
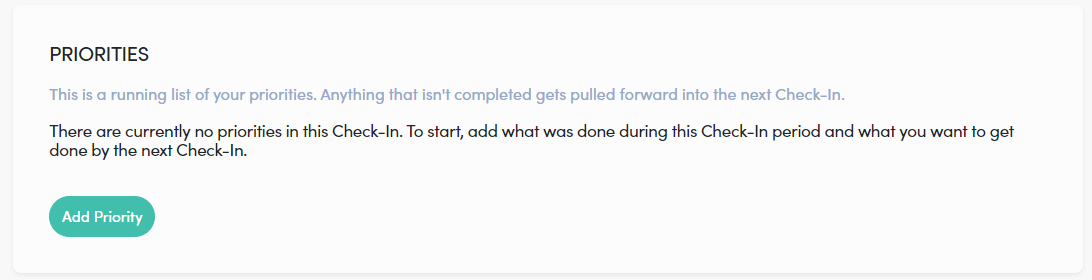
Next are Priorities, if you have specific things you need to accomplish before next week, fill them in here by selecting the 'Add Priority' button.
Completing the Check-In
- Begin the check-in process by rating your week using a star-based system:
- 1 Star: This week was bad and didn't go as expected.
- 2 Stars: This week was challenging but manageable.
- 3 Stars: This week was average and manageable.
- 4 Stars: This week was good but could have been better.
- 5 Stars: This week was great and exceeded expectations.

- Next, share your thoughts on what led you to rate your week the way you did.

- The next section contains a series of questions to help us understand your operations for the week and get an overall view of how you and your team (if applicable) managed the business. It may also include questions on how we can better support you from your perspective.
- Next up are your priorities, this is where you let us know what you are currently working on as a priority in your business or role. Begin adding your action items by selecting the ‘Add Priority’ button.
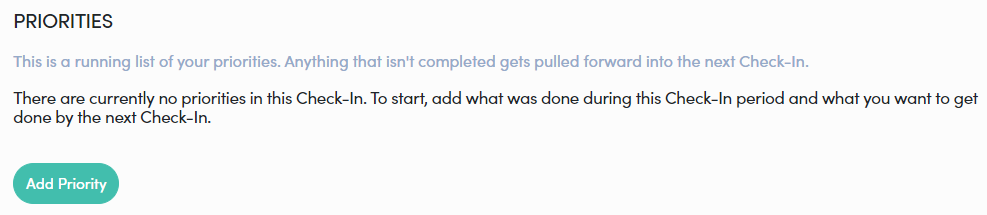
- After selecting the ‘Add Priority’ button, a pop up will appear asking you for your priority. You have the choice to either enter in a new priority and select the ’OK’ button, or hit the ’Cancel’ button to back out of entering in a priority.

- Once you have submitted all of your priorities, the will appear in a list on your screen.
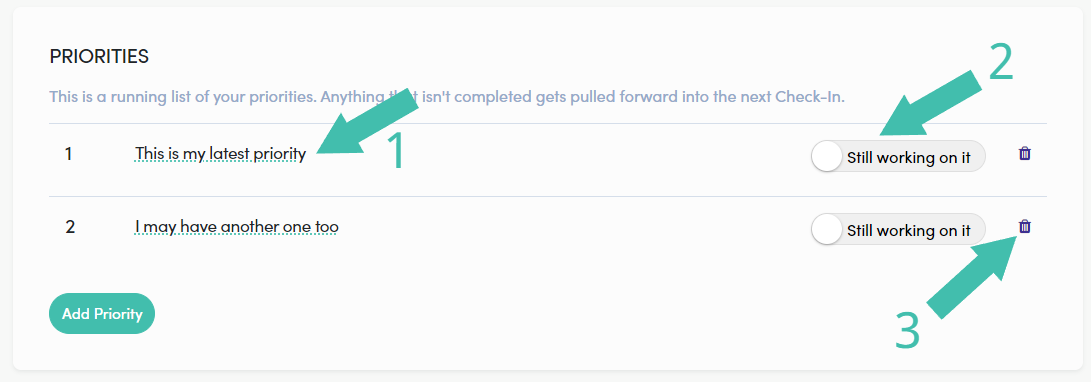
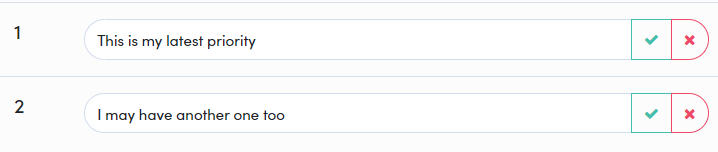
a. The first arrow in the image above shows the verbiage underlined and selecting the dotted hyperlink it will open up the priorities you created for editing (if needed).
b. After completing any edits, select the √. The x will cancel the editing and not save your changes.
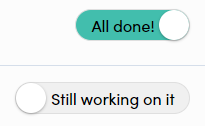
c. The second arrow in the image above reflects whether or not this priority has been completed over the time period that is being reviewed. Simply slide the bar to the right to show that you are finished with this item.
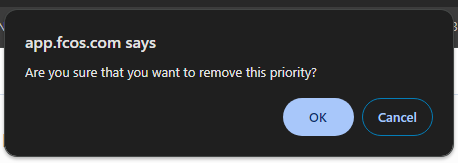
d. The third arrow in the image above reflects the trashcan icon that allows you to delete a priority if added by mistake or is no longer a priority. Once selected a pop-up will appear asking if you wish to remove the priority. Select ‘OK’ to delete the priority or select ‘Cancel’ if the trashcan icon was selected by mistake.
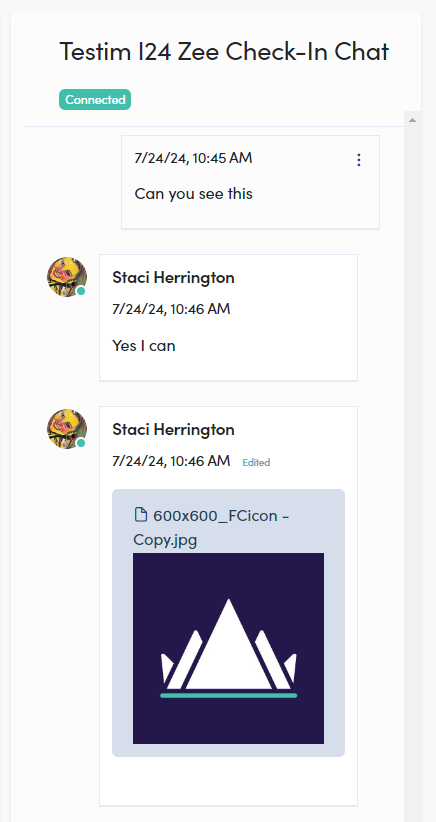
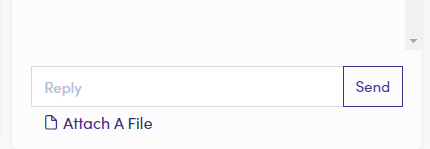
- The last component of the Check-In form is the Check-In Chat function, it allows you to chat with the reviewer about this check-in as well as attach any files you think may assist the reviewer with your check-in. The reviewer can also add files to send to you through the Check-In if it is deemed relevant to your check-in.
- Once you have completed your check-in, scroll back up to the top and select the ‘Submit’ button and your check-in for the week is now complete.