
Get to Know the, "Create a new ticket" Action
When creating a new Workflow you must set up a "Trigger" but you can also set up an Action(s) to occur when the triggering event happens.
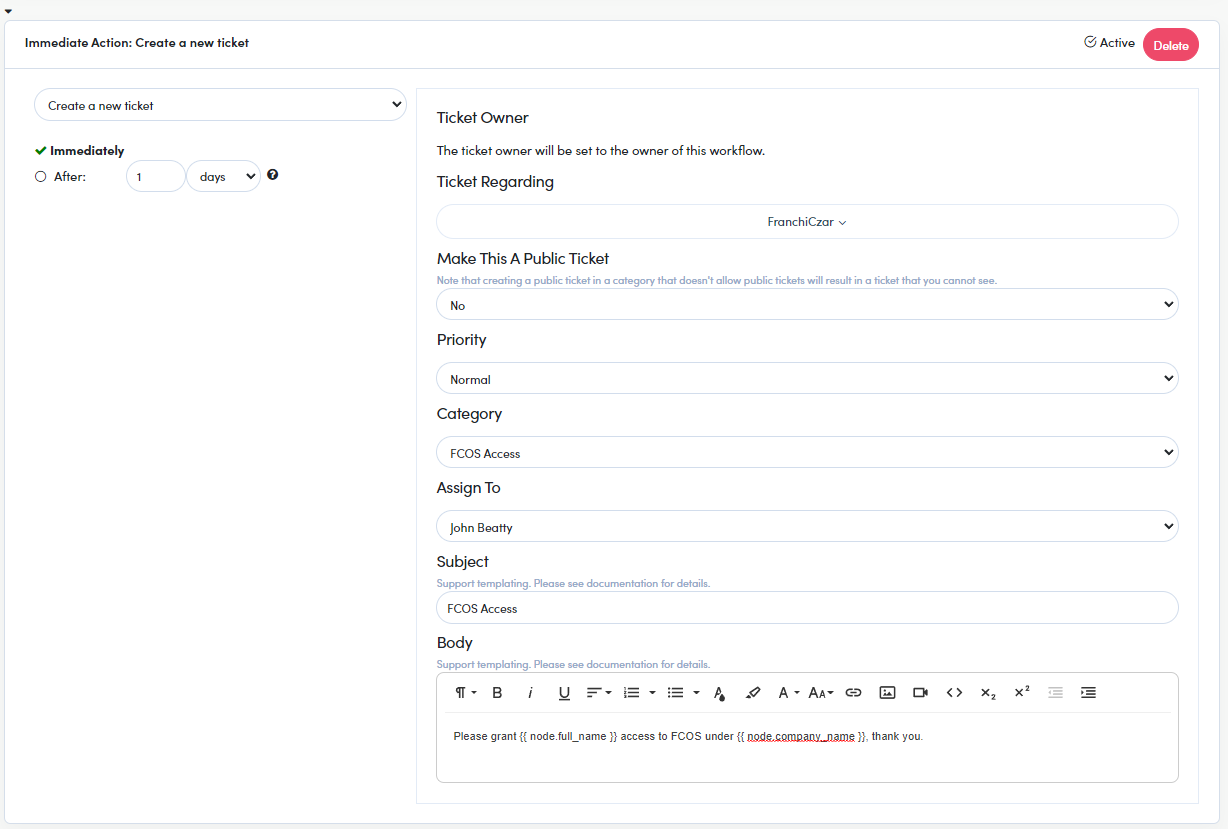
The Create a new ticket Action is configurable to generate a new ticket within the FranchiCzar OS system upon the event of the specified trigger.
Let's break down the elements and configuration needed for this Action.
Action Elements
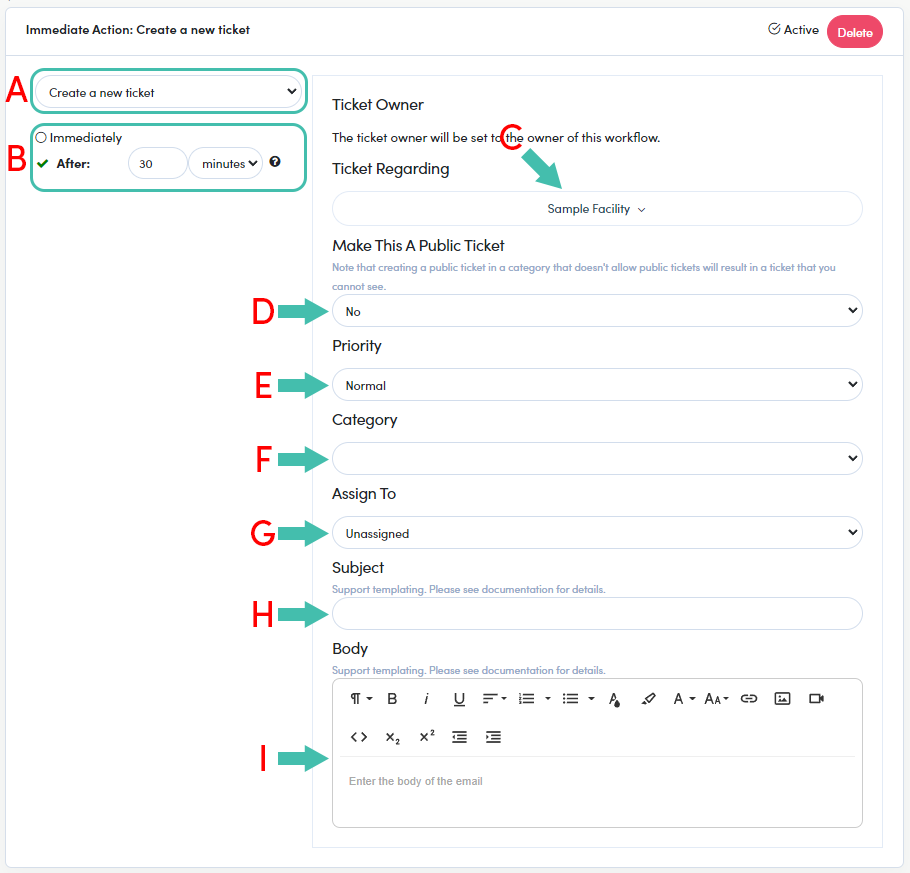
The "Create a new ticket" Action, just like most actions, has a number of configurable elements (image below) that affect things like when it occurs (immediate/delayed) and its specific content.
Let's check out what elements the Create a new ticket Action includes:
- Action selection (dropdown)
- Configure timing of Action delivery
- Select location to associate a ticket (dropdown)
- Public/Private ticket (dropdown)
- Assign a priority to ticket (dropdown)
- Place the ticket in a category (dropdown)
- Assign ticket to a user (dropdown)
- Ticket Subject header
- Content editor
Configuring Action
All of the elements, described above, need attention for the Create a new ticket action to work, as intended (as shown above):
- Ensure the Create a new ticket action is selected from the dropdown ("A" above)
- Configure the timing, Immediately is the default ("B" above)
- Select a location, regarding the ticket ("C" above)
- Select if you would like this to be a Public or Private (Yes/No) ticket ("D" above)
- Assign a Priority for this type of ticket ("E" above)
- Select a Category for the ticket (e.g. FranchiCzar OS) ("F" above)
- Assign tickets created by this action to a specific user ("G" above)
- Provide a Subject for ticket created ("H" above)
- Last, enter any general/specific content that you would like included in these tickets ("I" above)
CONGRATULATIONS, you know how to use this Action.