
Create Item (Subscription)
Selling your franchise's items, goods, products, and/or services to your customers is the substance that makes your business yours. FCOS makes this process straightforward so, you can get down to business. We are covering how to create a basic Subscription item in this article.
There are two types of items you can "Create". A Subscription item that lasts over a duration of time (or Interval) and, a Non-Subscribable item that is always "Paid in Full" upon purchase. Some examples of a "Subscription" are things like a season pass or a re-occurring course. A "Non-Subscribable" are things like a t-shirt or a single visit pass.
Franchisor Permission Settings
Franchisees will only be able to create "Subscriptions" if the Franchisor has allowed this via the POS Permission Settings.
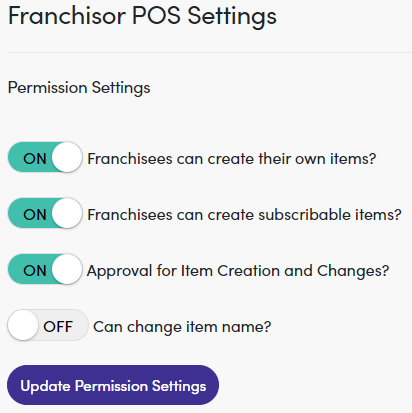
Franchisor Permission Settings
For you (a Franchisee) to create an item Franchisors will have to grant certain permissions via FCOS. The process here is done with these Permission Settings toggled ON:
Create Item Page
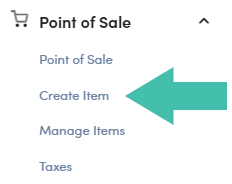
Franchisors and franchisees (with this setting toggled on) create new items through the Point of Sale menu within FCOS. Expand the Point of Sale menu and click on the Create Item option below.
Navigating Create Item Page
Clicking on the "Create Item" option loads a window where a new item's information is entered. Here is a breakdown of each field:
| Field | Description |
|---|---|
| Required? (checkbox) | This indicates that this item is "required" by the Franchisor for their franchisees to make available for sale |
| Name* (Required Field) | Indicates the name that appears within the POS |
| Description | Provide a brief description to appear within the POS |
| Item Images | Add an image for the item constrained to the predefined image size (see Settings: Point of Sale for more on this) |
| Categories* (Required Field) | Add the item to one or more predefined categories (see Settings: Point of Sale for more on this) |
| Visibility (Terminals)* (Default Field) | Defaults to FCOS Terminal |
| Subscriptions | Configure if the item will be a "Subscription" and/or if "Paid in Full" is applicable. |
| Subscription Intervals* (Required Field, if Subscription) | Apply the "Interval" (ex. Weekly, Monthly etc.) and the "Interval Length" (ex. how many of the applied intervals apply to subscriptions (this field is only required if "Subscriptions" are Allowed or Required) |
| Interval Pricing Constraints* (Required Field, if Subscription) | Set a "Minimum", "Maximum", and "Suggested Price" for the item. (If an item is a "Subscription" Franchisees set the pricing) |
Creating an Item
Now that we have run through all of the "Create Item" fields, let's go through the process of creating an item.
Step 1: Approval Banner
At the top of the page, a banner will appear if the Franchisor has Toggled on the "Permission Setting" requiring approval. This means that once you complete this item a similar banner appears for the Franchisor concerning items that require their attention.

Step 2: Name
The first field is "Name*" (this is a required field). Give your item a Name before you tab or click into the next field. We named this one, "Franchisee, Subscription Item" you will most likely give yours a more practical name.

Step 3: Description
In the next field, you can provide a brief Description of the item.

Step 4: Item Images
If you would like to add an image to your item within the POS, click ![]() and select the image size you would like. You can add an image for each of the designated sizes. Click the green checkmark to confirm your selection.
and select the image size you would like. You can add an image for each of the designated sizes. Click the green checkmark to confirm your selection.
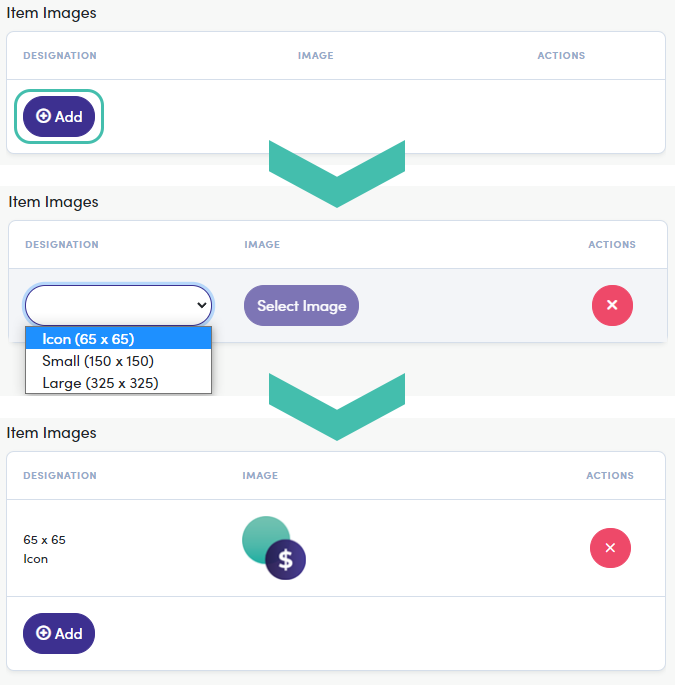
Franchisor Must Configure Image Designations
If your Franchisor has not created an Image Designation yet, you will need to contact them to configure this before adding an image for the item. This is NOT a required field.
Step 5: Categories
The next field is "Categories*" (this is a required field), you will need to assign your item to a predefined category. Click ![]() to display the drop-down menu, and select your desired category. Click the green checkmark to confirm your selection.
to display the drop-down menu, and select your desired category. Click the green checkmark to confirm your selection.
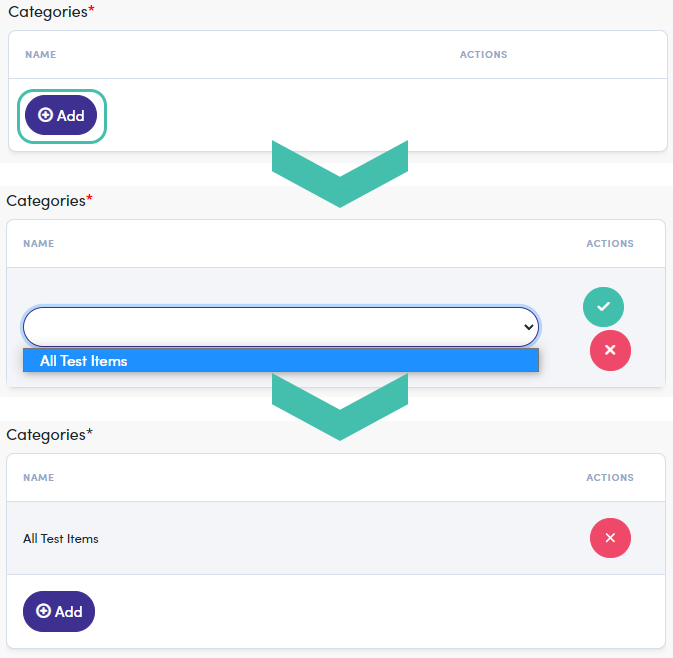
Franchisor Must Configure Item Categories
If your Franchisor has not created Item Categories yet, you will need to contact them to configure this before continuing to create this or any items. This IS a required field.
Step 6: Visibility (Terminals)
The "Visibility (Terminals)*" field defaults to the FCOS Terminal.
Continuous Enhancements
Look for a future enhancement to allow the configuration of custom terminals.
Step 7: Subscriptions & Paid in Full Configuration
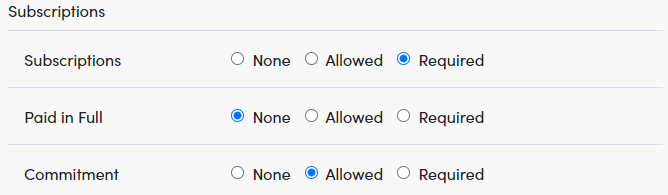
The "Subscriptions" section contains a number of radio buttons used to configure exactly how subscribable items are sold and what types of Commitments are supported within your POS. Let's go through these options:
| Field | Description |
|---|---|
| Subscriptions |
|
| Paid in Full |
|
| Commitment |
|
For this is a subscription item, I am selecting Required for "Subscriptions" (but you could also select "Allowed"). Additionally, you can add a setting for Commitment.
Step 8: Adding Subscription Interval(s)
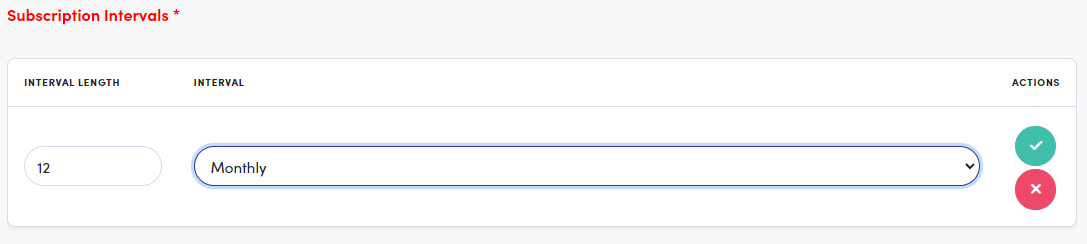
Since this is a "Subscription" item we also need to provide details for the interval (frequency of renewal) of the subscription. Click to expand Subscription Intervals. We are configuring this to be an annual subscription so, we set the Interval Length to "12" and the Interval as "Monthly". Click the green checkmark to confirm your entry.
Subscription Intervals
You can add as many "Subscription Intervals" for this item as needed. This will be configurable by repeating the process from the following section.
Step 9: Adding Default Interval Pricing
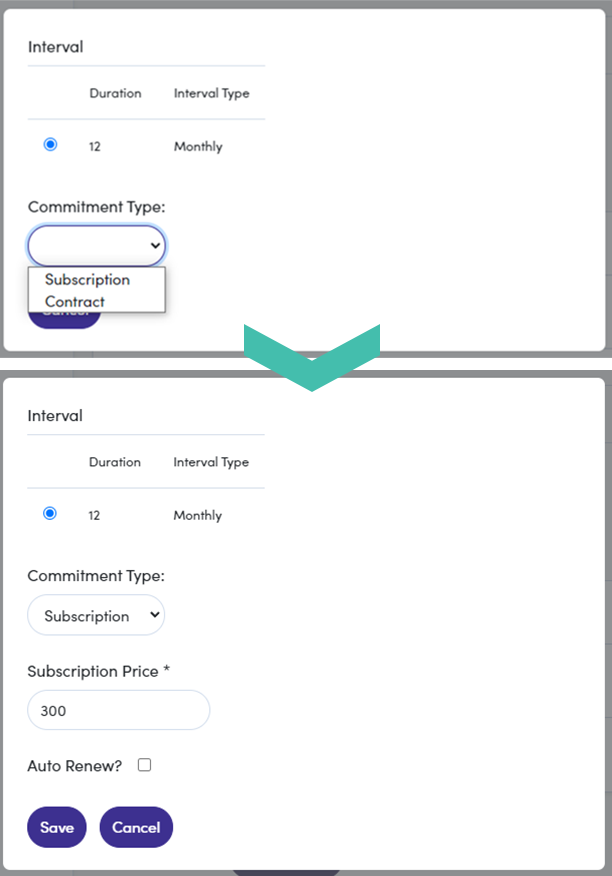
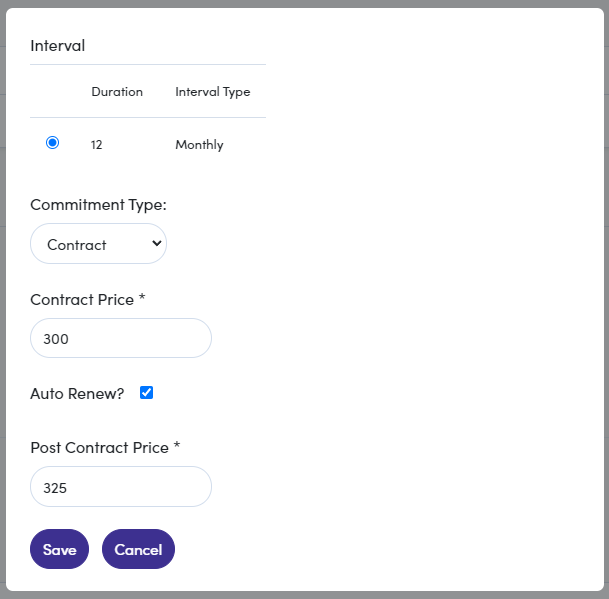
You need to add a currency type and a range for the item's pricing. Click  to launch the "Interval" modal (image below). Choose the Commitment Type "Subscription" or "Contract".
- Subscription - This is a commitment to a term that may be interrupted or canceled
- Contract - This is a binding commitment to a term that may NOT be interrupted or canceled without penalty
Set the Subscription (or Contract) Price and check the box for Auto Renew (if applicable) before Saving.
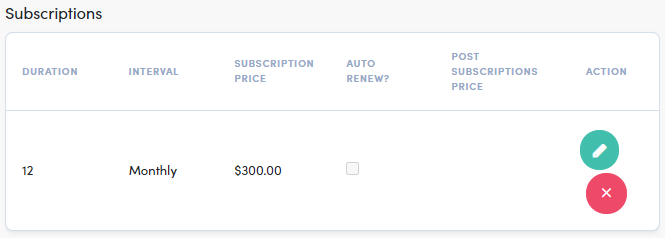
This is how the Subscription's "Interval Pricing" looks once configured.
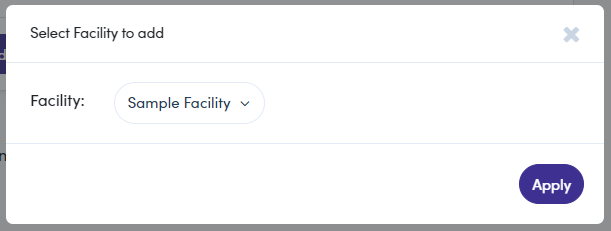
Step 10 (optional): Adding a Facility
We need to add a Facility where this item will be made available. Click  to launch the modal. Select a "facility" from the dropdown and click
  .
.
Step 11: Adding a Facility Interval Pricing
To configure your facility's interval pricing, repeat the step described in Step 9 (above). I also added selected Auto Renew? and configured a Post Subscription Price for this subscription.

Step 12: Adding Applicable Taxes
Last, we need to apply any Applicable Taxes by clicking the box next to any that are appropriate for this facility. These are listed just below the "Interval Pricing" section.

Default Pricing and Taxes
Taxes selected for the Default Pricing are ALWAYS used for this item. Ensure that any "Applicable Taxes" applied to the Default pricing are relevant to all Facilities. You can add additional "Applicable Taxes" when configuring Facility pricing.
Step 13: Saving
Check back over your item and all the selections/configurations made and Save when you are ready.
COMPLETE
